4.30.2013

Shabby Chic Card - Look Who Just Arrived

Oh what a lovely day...the sun is shining, I got some weeding done, played with my boys, and had time to make a card!  Hooray for a good day!   :)


I was inspired this week by the new Fusion Card Challenge (sketch only) and Cath's beautiful Tuesday Trigger (shown above) over in the Moxie Fab World.  When I saw the trigger a few thoughts came to mind...Spring, pretty, soft and sweet, floral, pink, and white.  So, I started digging through my stash and when I came across this gorgeous floral paper from Echo Park's Love Story collection I knew it was the perfect starting point for my card.

The paper inspired me to stray a bit from my normal style and go more shabby chic...


I based the layout of my card off of the Fusion #4 sketch (shown below).  I began by distressing my Core'dinations cardstock just to soften the look a bit.  After adhering my patterned paper I layered some pink ribbon and crocheted lace (Hero Arts) across the card.  Then I added some tulle behind my pink flower (Maya Road) and pleated some pink ribbon across the bottom of the slide frame (from Crate Paper's new collection 'The Pier' {insert puffy heart here!}) and adhered both to the card.  Finally, I distressed a small piece of the cardstock so that a lot of white was showing and stamped my sentiment in Antique Pewter (just a touch of metallic like the Tuesday trigger), trimmed it, bent it a bit to give it more dimension/interest, and adhered it with the button to the corner of the frame. 


Here is a close up so you can get a better look at the distressed sentiment flag, slide frame, and lovely ribbon layers. 


I hope you've enjoyed my project today because I will be back tomorrow with a coordinating gift/décor project!  :)

To play along in the Fusion challenge click HERE or the Tuesday Trigger challenge click HERE.

Hope you are enjoying some sunshine where you are today too!

4.25.2013

Watercolor - Old School Style


The sun has been shining here for the past three days so I haven't been crafting much...just enjoying time outside with my boys and doing some spring cleaning!  However, I did take a little time the other night to play around with some watercolors.  I am not much of a mixed media crafter (although I did love all kinds of art growing up) but I have been seeing so many AMAZING mixed media projects around the web lately.  So, when I saw Cath's challenge - The Wonder of Watercolor Challenge in the Moxie Fab World, I decided to see what I could come up with.  I went back to my preschool roots and started playing around with the crayon resist technique.

For those of you who (like me) may not have all the fancy art supplies, I simply used a white crayon and some Crayola watercolors to create this...


First I drew a heart in the middle of my card front and wrote the word love inside with white crayon.  Then I used washi tape to make a border around my card.  In order to get some richer areas of color and to see a little texture from the brush strokes, I first used just enough water to get some color on my brush.  Then I lightly swept the brush in a diagonal stroke back and forth across my card from top to bottom leaving some space between strokes to add my second color.  I repeated this technique with my second color and then added more water to my brush and lightly brushed it over my card to blend the colors and soften the color in places.  Finally, I removed the washi tape and voila! a beautifully framed watercolor/sentiment!
 
I am really happy with how this turned out and I think it was the least expensive card I have ever made! :)  I hope I have inspired you to try your hand at something new.  It is fun to experiment and you never know when it might result in something fabulous! 
 
If you want to participate in this challenge or see how others are creating with watercolor, click HERE.


4.16.2013

Birthday Party Decor & I'm a Cover Girl!


Well, I have been busy crafting for some submission calls but I wanted to stop in to share one project that I decided to make just for fun!  I am getting ready to celebrate my little guy's first birthday so I have been looking around the blogosphere for all kinds of inspiration and trying to decide on a theme and decorations.  So, last night I was playing around with my supplies and came up with this project...perfect to add a little fun to your food/dessert table or even to place at the birthday boy's place setting.

 
Fun, right?!  For this project I wrapped a little juice can with washi tape (4 layers to hide the images on the can).  Then I had fun decorating the can with Echo Park's Scoot stickers.  To create the flags I used a wooden dowel (although wooden skewers work well too).  I made a larger pennant style flag and decorated it with more stickers then accented it with the two smaller flags.  I love the candle and confetti paper...if you are in a hurry, simply creating a few of these would add a little whimsy to your party table decor!
 
Still not sure what I'm going to do for my little guy's party but I'm sure I'll have more party decor items to share soon!  And in July, Paper Crafts' new Birthday Creations magazine will be coming out and guess who has a project on the cover?!  Me! :)  Sooooo excited!  

Finally, in my search for great birthday party ideas I discovered a fabulous blog that I'm sure many of you would love as well...The Hostess With the Mostess.  There are truly some AMAZING birthday themes/parties that people have come up with and photographed beautifully. 

Have a lovely day!  I am hoping to get a few more projects started...


3.30.2013

Today is a Gift - Spring Home Decor


This week I was inspired by the beautiful Spring weather we are having, Crate Paper's Creative Weekly challenge (butterflies), and the Spring Home Décor challenge in the Moxie Fab World to create this...


ETA 4/2/13 - Just had to share that Crate Paper picked this as one of their runner ups for the challenge.  I'm featured on their blog along with several other talented crafters HERE!

Would you believe that I created this bright, spring décor mainly using Crate Paper's Snow Day collection?!  I had a lot of fun creating this and think it will now have a permanent place in my craft room.  If you are considering creating a framed décor item, I highly recommend embellishing at least part of the frame and removing the glass so you can include 3D items inside.  This adds much more interest to your project. 

Also, be sure to take a second look at some of your holiday/season specific papers...you might be able to use them in a whole new way!  In fact, Crate Paper's snowflake paper made some gorgeous butterflies when I was very intentional about where I punched the butterflies.  Although I didn't end up using them on this project, I thought I would still share a picture of them with you. 


Wishing you all a wonderful weekend and Happy Easter!  Remember...today is a gift, so enjoy every minute of it!

3.28.2013

A Little Hello...


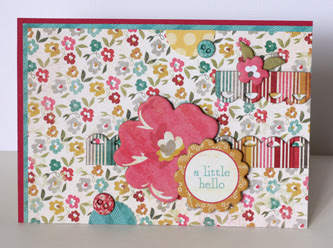
Spring has arrived!  The sun is shining here and my tulips are popping up...we are enjoying riding bikes and going for walks....gotta love it! :)  I thought I'd share my 2 cards that did not get picked up for the most recent Paper Crafts submission call.   I created these cards using the 2 go-to sketches.

My first card uses the gorgeous Collectable: Unforgettable collection by My Mind's Eye. 


I love the colors in this collection and the fabulous chipboard pieces made this card easy to put together.  I was able to get more out of the scalloped border by cutting it into three pieces and for that bottom row I separated the two pieces where the flower is (since it would have just covered it up anyway).


My next card was created using Carta Bella's So Noted collection. I had fun layering all the frame stickers and using a frame to feature my sentiment too.


I am looking forward to the weekend...Easter celebrations and time with family.  But I'll be back before Sunday with a little home decor item to share!

3.22.2013

Lucky no. 5

This past year, my middle child turned 5 and it was quite the event.  Not because we had some huge party but just because, to him, it seemed to mean a lot.  Months beforehand he would talk about turning five, how close he was to turning five, etc.  He told us he wanted us to hide and surprise him when he came downstairs on his birthday.  A lot of thought and conversations were had about him turning 5. 

Then his birthday came and he was so proud to be 5...making sure to tell everyone (repeatedly).  We did surprise him after dinner by telling him to clean up his room and then come downstairs.  We turned off the lights and yelled surprise when he came down.  He loved it!  I'm not sure why 5 is such a special year for him...maybe because he was born on the 5th, or because 5 seems to be more a 'big kid' age.  Whatever the case, it is special to him and it is special to watch his excitement and pride about being 5 so I definitely wanted to make sure to document it.

When I saw Bo Bunny's current challenge to use the word LUCKY on a layout, I knew it was the perfect opportunity to scrapbook my boy and his lucky no. 5!


I don't know if I was feeling St. Patrick's Day or just coordinating with the color of my son's sweatshirt, but I do love all the green and how it really pops off the white.  I used products from Bo Bunny's Double Dot, Peacock Lane, and new Surprise collections for this layout.  (The card stock is Bazzill, alphabet stickers are American Crafts, and I added Doodlebug glitter on the die cut present.)

I went really clean and graphic with this layout.  At first I was going to do a 1 page 12x12 layout but I really wanted to include the professional photo of my son and it just didn't go with the evening birthday photos.  So I decided to switch to a double page 8.5 x 11 layout so that I could highlight/separate the professional photo and I think it worked well. I even love the look of the title page by itself...but it just doesn't tell enough of the story alone.


I am also entering this layout into Chic Tags Sunday Challenge because it inspired me to use stars!

Thanks for stopping by!  Have a wonderful weekend!

3.16.2013

Cute and Simple with My Mind's Eye

The weekend is here...hooray!  One of my boys is fighting an ear infection and I am lacking sleep but other than that, we're good!  The current challenge over at the My Mind's Eye blog is to use their die cuts like their journal cards, titles, etc.  I immediately pulled out my Alphabet Soup playing cards (hoping they count) to make some fast and fun cards.  I just love all the adorable images on these playing cards.  I bought both the girl and boy sets back in 2010 and since each set comes with 52 cards (2 for each letter) I still have lots to play with...gotta love that!  :)

Anyway here are 4 cards I whipped up last night using the playing cards along with various MME papers, brads, and stickers.


Ahhh...summer.  Can you feel it?!  Since I have two of each card, I was able to cut the sails out of the second card and pop them up on foam squares to add dimension to this card. 


I love this little robot and thought pairing it with the new Boy Crazy collection would make a great Valentine/love card for one of my boys.

 
**OUT FOR PUBLICATION**


And finally....


The heart/polka dot flag on this card is actually the back of one of the girl playing cards that I just trimmed.  I love how the cards are so colorful and just the right size for card making.  As you can see, I just simply needed to dress them up a bit to come up with some fun cards in a short amount of time.

And if you are looking for more inspiration, here are the links to two more of my favorite cards using these Alphabet Soup playing cards:
http://capturingcreativity.blogspot.com/2011/04/welcome-home-etsy-inspired-challenge.html
http://capturingcreativity.blogspot.com/2011/02/wont-you-bee-mine-mme-challenge.html

To participate in the My Mind's Eye challenge or to see the other entries, click HERE.

Have a wonderful weekend!